Sunday, 26 February 2012

Those who actually read my posts will know I always go on about the weather!! I can't help it...I am an island girl after all!! The weather has been excellent over the past few days......I love seeing my washing drying on the clothes line with the smell of washing powder and comfort filling the air. I love the longer evenings, and that we can maybe be just about brave enough to go out in a t-shirt! (that doesn't include me - I'm still wearing a scarf indoors).

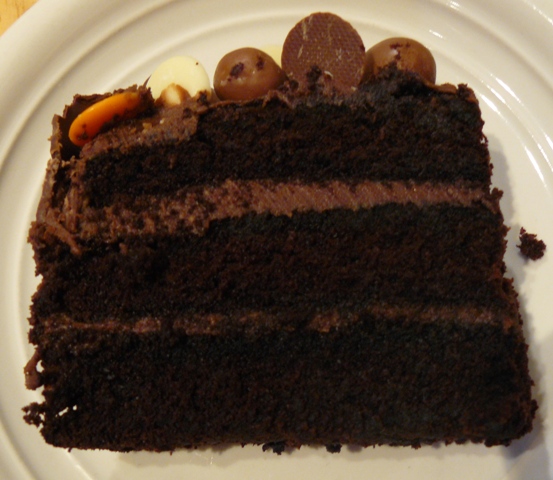
But dark, cold evenings does mean more time to look at Pinterest to find more ideas and things to bake, so Hmm how about these below........probably about two thousand calories per slice - I wouldn't even try to work it out!!

Chocolate Cookie, Oreo, Brownies - a layer of chocolate chip cookie dough, covered in oreo's, smothered in brownie mix and baked to perfection!!


Oven temperature 180 degrees Celcius, greased and lined 9 x 13 inch pan

Cookie Dough

1 cup butter
1 cup granulated sugar
1 cup dark brown sugar
2 eggs
1 tablespoon vanilla extract
2 1/2 cups plain flour
1 teaspoon bicarbonate of soda
1 cup chocolate chips

2 pkts oreos

Brownie Mix

350g dark chocolate, broken into small pieces
250g butter
3 eggs
250g dark brown sugar
100g plain flour
1 teaspoon baking powder.


Method

To make the cookie dough - Cream the butter and sugar until pale and creamy. Mix in the eggs and vanilla extract. Add the flour and bicarbonate of soda and mix together until all the flour disappears. Mix in the chocolate chips. Press the cookie dough into the prepared pan.

Lay the oreos over the cookie dough and then set aside.

To make the brownie Mix - Melt the chocolate and butter together in a heat proof bowl ( I use the microwave). In another bowl, whisk the eggs and sugar together until pale and fluffy. fold the chocolate into the egg mixture with a large metal spoon. Fold in the flour and baking powder.

Pour the mixture over the oreos and cookie dough and spread out. Bake for approximate 40 minutes until the surface is set and slightly cracked on the top. Remove from the oven and allow to cool in the tin.

For extra calories - add ice cream or cream and serve while the brownie bars are still warm.......then eat nothing but carrot sticks for the rest of the week!!!

Tuesday, 21 February 2012

I have been rather lazy recently......wanting to update my posts but just not getting sorted and getting down to it!! I am blaming it on the recent cold snap - I'm a Leo - so I need sun, sun, sun....so the recent cold spell has left me feeling pretty despondent!! Still there have been moments of joy.....seeing Snow Patrol on a rather snowy night in Birmingham in early February was brilliant! I am also lucky to have a lovely family who appreciates all my baking efforts and this caramel apple cake was definitely one that was a lovely treat on a cold evening and boy did it taste good!! A moist sponge with lots of apple pieces, enrobed in caramel = heaven!!


3 cups plain flour
2 cup granulated sugar
1 teaspoon baking soda
1 teaspoon cinnamon
4 eggs
1 cup sunflower oil
2 teaspoons vanilla
3 cups apples finely chopped
1 cup chopped nuts (optional)

Caramel
1 cup dark brown sugar
6 tablespoons butter
1 teaspoon vanilla
2 tablespoons cream

Heat the oven to 180 C/ 350 F/ Gas Mark 4. Lightly Grease a 9 x 13 inch pan

Mix the flour, sugar, baking soda and cinnamon together in a bowl.
In another large bowl, beat together the eggs, oil and vanilla until light and foamy.
Add the flour mixture to the egg mixture with a spoon and stir until the flour is combined. (It will be a little stiff and gluey, but will loosen when the apples are added.)
Stir in the apples and nuts if using.
Scrap the batter into the pan and bake for about 45 minutes until golden, risen and cooked.
Remove the cake from the oven, leave it in the pan and place on a wire rack.

For the Caramel

Place all the ingredients in a saucepan and cook, stirring all the time over a medium heat until the mixture gently boils. Cook for 2 -3 mins after the mixture begins to boil. Remove the saucepan from the heat, then pour the caramel over the hot cake. Leave the cake to cool before serving.

Sunday, 8 January 2012

Happy New Year everyone. This is my first post for the New Year and hopefully the first of many! I have made a card - the first in ages.....but I have been baking (see below)!!! The challenge over at Secret Crafter this week is Let them eat cake and this layout comes from the fantastic sketch over on Sweet Stop Sketch challenge Blog.

The papers I have used here come from Milson & Co range (free pad with Papercraft Essentials Magazine), the cute little image came free from Sliekje Digi Stamps and the sentiment is from Stampin up. The image has been coloured with promarkers and I used a fiskars border punch for the edging. Black and pink cardstock from my stash!!


Now onto the baking. I spotted a pull apart Lemon cake on Pin Interest via here. I have changed the recipe slightly as the dough was far too sticky, so I added the flour differently.

I am not sure if I would call it a cake - I am thinking its more like bread, so I am going to call mine Pull apart Lemon Bread!! The smell when it is cooking is just fantastic and it simply just pulls apart - all the slicing is done before it is cooked. Also I was unsure if actual plain flour would work with yeast and would it rise (but it did), I am guessing that strong bread flour, would give it a different texture. I didnt use an expensive brand of plain flour either (er cough Aldi for 52p).
Being desperate to try it out yesterday, am visually thinking I had all the ingredients I started out by getting the flour, yeast etc all mixed and ready. However when it came to adding the vanilla, I discovered I didn't have any - so I used a coconut flavoured one instead. I also only had two lemons instead of three, but it did have a lovely lemon taste with a hint of coconut - but will definitely use 3 next time. It was the softest, tastiest bread and even the ends were tasty. Mine is looking a bit extra brown (didn't hinder the taste) because after 20 minutes when I was supposed to have covered it in foil - I discovered I didn't have any foil either!!! I then had to hope it would be cooked quickly - it did - within 30 minutes. To top it all off - the bread came out of the oven, it had moments to cool before the first slices were pulled of and comments were made how good it tasted - only this morning I realised I never poured the icing over the bread - so I am so going to have to make this again!!

The sliced bread risen and filled with lemon and sugar


The cooked Loaf


The inside with flecks of lemon and orange zest.


Pull Apart Lemon Coffee Cake (Bread)

Sweet Yeast Dough
2 3/4 cups plain flour plus some extra
1/4 cup granulated sugar
2 1/4 teaspoons (1 envelope) instant yeast
1/2 teaspoon salt
1/3 cup milk
2oz unsalted butter
1/4 cup water
1 1/2 teaspoons vanilla extract
2 large eggs

Lemon Sugar Filling
1/2 cup granulated sugar
Zest of three lemons
1 tablespoon finely grated orange zest
2 oz unsalted butter, melted

Tangy Cream Cheese Icing
3 oz cream cheese, softened
1/3 cup icing sugar
1 tablespoon milk
1 1/2 tablespoons fresh lemon juice

Make the dough:

Heat the butter and the milk together until the butter melts. Set aside to cool slightly. While it is cooling Mix the flour with the yeast and the sugar and salt in a large bowl. Add the water to the milk mixture and stir in the vanilla extract

Pour the milk mixture over the flour and stir until combined. Mix with an electric mixer at low speed and add the eggs one at a time, mixing each egg until it is combined.

Sprinkle the dough with 2 tbsp of flour and knead it with a dough hook for 3 minutes. The dough will be sticky but should become soft and smooth from the kneading. Leave the dough in the bowl, cover it with plastic wrap, and let it rise in a warm place 45-60 minutes or until doubled in size.

Mix the sugar, lemon zest, and orange zest. It will draw out the citrus oils and make the sugar sandy and fragrant.

Preheat the oven to 350°F (175°C). Grease a 9″x5″ loaf pan or spray it will baking spray

Forming the loaf: Deflate the dough with your hand. Add flour by the tablespoon as necessary, kneading it to incorporate the flour so the dough is soft enough to roll out on floured surface into a 20″ by 12″ rectangle.

Melt the butter and use a pastry brush to thickly coat the dough with the melted butter

Use a pizza cutter, or a sharp knife to cut the dough crosswise in five strips, each about 12″ by 4″ (it might not be this exact size, but try to make the five strips be equal sizes). Sprinkle 1 1/2 tablespoons of the lemon sugar over the first buttered rectangle and gently press the sugar in. Top it with a second rectangle, sprinkling that one with 1 1/2 tablespoons of lemon sugar as well. Continue to top with rectangles and sprinkle, so you have a stack of five 12″ by 4″ rectangles, all buttered and topped with lemon sugar.

Slice this new stack crosswise, through all five layers, into 6 equal rectangles. Carefully transfer these strips of dough into the loaf pan, cut edges up, side by side. it might be a little roomy, but the bread will rise and expand after baking. Loosely cover the pan with plastic wrap and let the dough rise in a warm place until puffy and almost doubled in size, 30 to 50 minutes.

Bake the loaf for 20 minutes and then check to make sure that top isn't browning too quickly. If it is, just cover the top of the loaf with tinfoil and continue baking for a further 10 to 20 minutes until the loaf is golden and cooked. (Mine took 30 minutes in fan assisted oven) When done, transfer to a wire rack and let cool in the pan for 10 to 15 minutes.

Make the cream cheese icing. Beat the cream cheese and icing sugar together until smooth, then add the milk and lemon juice. Stir until creamy and smooth. Spread over the warm bread. Enjoy

Thursday, 29 December 2011

It's the season to be baking - tra la la la la, la la la la!!! Christmas cakes, mince pies, cupcakes.....baked, decorated and eaten - well I still have one undecorated Christmas cake in the cupboard, but since everyone has consumed a years worth of calories in a matter of days, I think the Christmas cake will stay put for a while yet.

The one thing which one of my sons always ask for at Christmas is a baked cheesecake.....which we all like....... but every Christmas?? This year to incorporate several likes, I made a trio of desserts, baked cheesecake with berries, chocolate brownies with ice cream and a brandy-snap with white chocolate mousse. (The ice cream I bought, but everything else was made at home including the slightly tangy berry sauce).

Now brandy snaps has to be the most fiddly things to make!!! I made two at a time, and made just enough for one each - no there was none for seconds - I just couldn't devout the patience! The brownies were simple and easy to make and the cheesecake was just as easy and there was plenty of left overs which disappeared by the 27th!!

The picture shows a huge portion, but we all had a half a portion of brownie and cheesecake after our Christmas dinner - I couldn't cut the brandy snap down!!

Today.....I have an urge to bake.......but I think the hubby would have a fit if I produce anything sweet for the next few weeks lol - ooh but anything savoury would make him happy so mini smoked salmon frittatas and quiche for the boys will make everyone happy!


Vanilla cupcakes for School Christmas Party

Monday, 5 December 2011

December crept in rather quickly........as we found out on Thursday morning when the youngest son got out of bed......to no advent calendar!!!!!! Okay it was a mix of getting one later, having a look at some upmarket ones online but then deciding against it and then of course realising on Thursday morning that we hadn't actually got any!!! We duly explained to a the younger son that he would be getting his after school as dad was off work and would go and get him one.........only to find by that evening..........we couldn't actually even buy one in our town!!!

Not wanting to make younger son think that he would be the only child without an advent calendar.....I told him (without thinking) that I would make him one after he had gone to bed and he would then be able to open up two windows the next morning.........he of course went to bed rather excited and very happy.

At eight thirty on Thursday night, I was beginning to wonder why I had even opened my mouth to suggest I would make him one and even more so......to start making one after eight thirty at night!!!! Having searched through my stash and a little help from Google......sour cream packets were born!!

I had some thick pearl A4 papers from Crafters Companion. I cut each sheet into four equal size rectangles, used some double sided tape to glue together two of the sides, trimmed with some fiskars scallop edge scissors, and finished of with a punched hole at the top and bit of fuzzy wool and a line of string and paper clips to hang it. Numbers generated on the computer and punched out using a circle punch.

By midnight it was all assembled........I managed to find two treats for days 1 and 2 and the advent calendar was ready. He wasn't to know the other packets were empty......until a mad dash to the shops on Friday afternoon!!

The next morning.....the facial expression said it all.......he was so pleased with the "world's biggest advent calendar"............we have to meticulously take down each one and he takes out the treat, then it has to be hung back up.............it is his biggest pride and joy!!!

I am going to showcase this on Make it Monday.........for all the hours it took.........it still goes to show how a little paper, tape and imagination can bring happiness to someone.


Monday, 28 November 2011

It's pie season - pumpkin pie, mince pies - you name it, its in some kind of pie at this time of the year! This week I have baked whoopie pies - they went to the schools cake sale for the girls book club and on the weekend (yesterday), our first batch of mince pies!! These have to be the poshest mince pies - sweet shortcrust pasty, topped with a Viennese biscuit topping, so they are light, buttery and crisp and who cant resist a buttery biscuit????


Recipe:


Makes 16 large (muffin pan) or 30 small (mini muffin pan)

Pastry:

80z plain flour
4 0z butter
1 tablespoon sugar
1 medium egg (beaten)

Viennese Topping

6 oz butter (softened)
1 1/2 oz icing sugar
6 oz plain flour
1/2 tsp baking powder

Filling : 1 lb mincemeat (the sweet fruit kind - Tesco (UK) finest with Brandy and Port is fantastic)

Method

Preheat the oven to 190C/375F/Gas Mark 5


To make the pastry - sift the flour into a bowl and rub in the butter until the mixture resembles breadcrumbs. Stir in the sugar, then mix in enough egg to make a firm dough. Knead the dough on a lightly floured surface for about a minute until smooth. Wrap the dough in cling film and chill in the fridge for a minimum of 30 minutes.

To make the Viennese topping: beat together the butter and the icing sugar until pale and fluffy. Sift over the flour and the baking powder and beat in. Spoon the mixture into a piping bag fitted with large star nozzle.

Roll out the pastry thinly and cut to the approximate size of the muffin hole using a cutter. Line the muffin tins with the pastry circle and divide the mincemeat between the pastry lined tins.

Pipe the Viennese topping over the mincemeat in swirls then bake for approximately 20 minutes until golden.

Remove from the oven and allow to cool for a few minutes in the tins. Remove from the tins and place on a cooling rack. Serve warm or cold.

The pies will keep for up to 5 days if stored in an airtight container.


Monday, 21 November 2011

Warm days, cold days, warm days, cold days........what's up with the weather????? Everyone seems to have been coughing, sniffing and sneezing over the past weeks and for the past four days, I have found myself in the same boat!

The queues in the shops are beginning to increase.....stressed out people in car parks trying to find a park as close to the shop as possible.....oh how I remind myself why I like the internet at this time of the year!!!

After a run of no baking - its the last thing you need to do when you're sniffing - I had to bake the guys something yesterday.......they look forward to the creations that come out of the kitchen and at least I get feedback!! A roulade means not much handling with the hands (the biggest passer on of the cold), or should I say not much touching with the hands, because its covered with paper for rolling up too.

This went down a treat last night..... by nine o'clock, hubby and middle son was eating their third slice each (I know....... alright for some) - Chocolate roulade with white chocolate and raspberry filling.


Chocolate Roulade

Oven temperature 180 degrees Celcius, 23 x 33 baking tray greased and lined with baking paper (or a rectangular roasting tin of the same size :) )

For the cake:

175g caster Sugar
6 large eggs
200g dark chocolate (I used 45 % cocoa content)

For the filling:

200 ml extra light double cream (Elmlea has half the fat of other brands)
150g white chocolate
150g fresh raspberries

To make the cake:

Melt the dark chocolate and allow to cool. Separate the eggs into to large mixing bowls. Make sure the egg whites go into a bowl which is grease free other wise they will fail to whisk. Whisk the egg whites until thick and forming soft peaks (if you turn your bowl upside down they should stay in the bowl), then in another bowl, whisk together the egg yolks and the caster sugar until pale, thick and creamy.

Fold the chocolate into the egg yolk mixture using a large metal spoon, being careful not to knock the air out of the mixture.

Add two large spoonfuls of egg white to the chocolate mixture and fold in using the large metal spoon, until all traces of the egg white have disappeared. Then fold in all of the remaining egg white - be patient - be gentle - you are making a sponge!!

Pour the mixture into the prepared tin and tilt the tin gently to ensure that the mixture reaches the corners of the tin.

Place in the oven and cook for 15 to 20 minutes until well risen. The top should appear slightly crisp.

Remove from the oven and leave to cool completely in the tin. Don't worry it is suppose to sink!

For the filling:

Melt the white chocolate and allow to cool. Once cool, pour in the cream and whisk together until soft peeks have formed.

Assembling the Roulade:

Turn the roulade out onto a sheet of baking paper. You can either sprinkle caster sugar or icing sugar on the paper first (I didn't). Leave about an inch on the short side closest to you, free of cream, Spread the cream over the rest of the cake and then dot with the raspberries.

Use a knife to make a shallow cut along the 1 inch piece of cake (which you have left cream free). This will make it easier to roll. Using the paper to help, roll up the roulade.

I have finished mine of with shaving of white chocolate scattered along the top.


Monday, 31 October 2011

Happy Halloween!!

It's the last day of October, and I am beginning to detest the fact that as of tomorrow we will be saying "It's Christmas next month!!!" Don't get me wrong - I love Christmas - the preparation, the shopping (as long as its over the internet), the gift wrapping, and preparing and cooking a Christmas meal and anything else festive, but Christmas has really crept up on me far too quickly this year. ahhhhh!!

This weeks Challenge over on Crafting When we can is Halloween/and or Anything but a Card, Secret Crafter is Spooky or Whimsical, My Mum's Craft Shop Challenge is Spooktacular, and Dream Valley Challenges is Anything Goes, so I am entering the card below in all of these.

Our youngest was invited to a Halloween party on Saturday which was perfect as I also made the cupcakes too for the party. The image on this card which is perfect for boys was free from Dustin Pike and the Halloween papers from Shery K Designs. The spider I found on some clipart and the sentiment I made on Acme Labelmaker.


Oh I so enjoyed decorating these cupcakes - the bloodstained eyeballs, the mummies and these piped chocolate spider webs turned out beautifully and I hope the kids enjoyed them too.


Thursday, 27 October 2011

It's soooooo wet today. The rain has been pouring since we got out of bed and hasn't stopped. However this makes it a good day for sorting - much to the kids dismay!!! Bedrooms have been de-cluttered and de-junked!!!

Today I am showcasing some invitations I have started making for a very special couple - my in-laws will be celebrating their 50th Wedding Anniversary in December and I am on a mission to make the invitations and get them in the post by the end of tomorrow so they will arrive in St Helena by the end of November (I hope).


Now as any St Helenian will know.....Cheese straws are featured highly at any party, or gathering within a St Helenian community. These fingers of crispy cheesy pastry are addictive....I mean once you start on them......the only point at which you can stop picking at them is when they are all gone. From a bakers point of view.......bake them when you're home alone and have lots of spare time........you will at least have some time to savour your effort.....before they disappear and you're left with nothing but the washing up!!!


Recipe

Preheat the oven to 150 degrees C/300 degrees F/Gas Mark 2

8 oz/225g Mature Cheddar Cheese grated
2 oz/50g butter
4 oz/110g Self Raising flour
1 egg beaten
pinch of salt
cayenne pepper or paprika (amount depends of level of spiciness)
Beaten egg for glazing

Method

Rub the butter into the flour until it resembles fine breadcrumbs
Stir in the salt and the Cayenne pepper or paprika
Stir in the grated cheese making sure the cheese is distributed in the flour
Add the beaten egg gradually to form a firm dough.
Wrap in Cling-wrap and chill in the refrigerator for 30 minutes or longer
After 30 minutes roll out the dough on a lightly floured surface to about 1/2 cm (half cm) thick. (It may be easier to cut the dough and roll out in small quantities).
Using a knife or pizza cutter, cut the dough into straws measuring approximately 10 cm by 1 cm
Arrange the straws on a baking tray with a gap between each. Bake for approximately 20 minutes until golden.
Remove from the oven and leave on the tray to cool (They will crisp on the tray as it cools). Removing them too soon from the tray will mean chewy cheese straws!!!!

They are sooo time consuming to make......but so worth the effort.

According to my seven year old try makes practice - not practice makes perfect!!!


Yesterdays Baking - Cheesy Monkey Bread (Delicious with Soup)

Tuesday, 25 October 2011

It's half term holidays.....which should mean time to craft and time to bake....but it seems my week has already been preplanned with college trips and days out so I am going to have to squeeze in some time to craft and bake!!

A couple of weeks ago I made these little chicken and leek pies with a hint of chilli (got to have chilli) and home made shortcrust pastry. They went down a treat in the house, and they were just as tasty when reheated the next day.

Monday, 17 October 2011

Halloween is just around the corner and the shops are full of orange and black things and appropriately a lot of the challenges around at the moment is focusing on Halloween. Cardmakinmamas, One Stop Craft Challenge and Everybody Art Challenge are all hosting a Halloween challenge at the moment!

This is a real digi card this week - the image, sentiment and papers are all digi and they were free - only the black, orange and white card stock, lace and ribbons are from my stash.

This gorgeous little image is this weeks freebie at Bugaboo Stamps and was brilliant to colour with promarkers and a white gel pen. The "Boo" papers came from Shery K Designs - I recoloured it orange before printing. The patterned paper at the bottom of the card came from The Background Fairy and they are all FREE!!! The sentiment was made on Acme Label Maker!


It was national chocolate week last week - so I was told.....but hey not many people need an excuse to eat chocolate!!! This was the boys weekend treat - a chocolate cake, filled with chocolate Ganache, covered with ganache and lots of maltesers, white and milk chocolate buttons and these brilliant orange flavoured chocolate buttons. To finish it all off a big band of a darker shade of milk chocolate (yes that's what it's called from in Aldi)


Monday, 10 October 2011

The cold weather has come with a vengeance - the wind is reminding us that it is Autumn after all! Winter woollies, and homemade soups are going to be featuring quite highly in our house in the coming weeks, as we try to banish the sniffles and colds!!

This weeks challenge over at The Sugar Bowl is a sketch by Gayle along with a picture of her dream kitchen for colour inspiration. I've had this little Sugar Nellie stamp for ages, (I won her for Sugar Nellies first Birthday) and she was all wrapped up in her packaging lovely and new two years plus..........until now! I've coloured her with promarkers, the Green papers have come free with an addition of Papercraft Essentials Magazine, ribbon, gems and pink cardstocks from my stash. The border has been made with a Fiskars border punch. The sentiment is a clear stamp from Studio G Designs.

I am also entering this card in The Totally Gorjuss Challenge which is Ooh La La.....as this little girl just really make you want to say that!!

One Stop Craft Challenge is anything goes......so I am entering her there too!!


Microwave Chocolate Pudding

Because I bake, our house is never short of essential baking ingredients so in moments of family desperation.........when they are swinging on the fridge door looking for something of a dessert nature and a yoghurt will not suffice......this can be prepared, and cooked in less than ten minutes and works wonders!!!


Serves 6-8
Ingredients:

4 oz self raising flour
4 oz caster sugar
4 oz butter or margarine
2 eggs
8 tablespoons milk
3 tablespoons cocoa
up to 4 oz chocolate broken or chopped up roughly - I use what ever I have......chocolate buttons, cooking chocolate, a mix of plain, white and milk chocolate, orange buttons etc

Method

Mix all the ingredients together in an large oven proof container. The pudding will rise to about double size of the uncooked mix.

Place in the microwave and cook on high power for 4-6 minutes. The mixture should be well risen and the middle just a little wet on the top. This will cook through during the cooling period.
Allow to cool in the microwave for 2 minutes.

Remove and serve, either hot, warm or cold with either custard, cream or ice cream.


Sunday, 9 October 2011

I have an excuse for not blogging - the weather has been brilliant, so we have been trying to catch the few hours after work outdoors.......but it's now back to dull afternoons, dark evenings and photos with lots of shadows!!!

Challenge 71 over at Sketch N Stash is a brilliant sketch with an optional extra of three different patterned papers and three embellishments either flowers or buttons - I went for both the options!

The papers are new, they came free with this months addition of Papercraft Essentials Magazine and they are from Wild Rose Studios, The image is the gorgeous Birgitta from C.C. Designs and the sentiments came free from The Beary Scrap. The lace and flowers is from my stash as well as the diamond dust on the heart and cupcake frosting. Oh and I love this chair which was free from Bird's Cards - it was so perfect for Birgitta to sit on and hold all those cupcakes!! I used promarkers for the stripy wallpaper and to ground the chair.

I am also entering this card in the following Challenges:

Cute Card Thursday - Time for Cake
Secret Crafter - Anything Goes as long as it sparkles


Lemon Meringue Cupcakes - Made with Cream not Butter (Recipe Below)

Last weekend, myself and our small son did some baking. Oh how he loved baking these, they were quick to make, tasted brilliant and to his amazement we could make a cake that you didn't have to put a big lump of butter or margarine in - oh so fascinating when you're 7!!! When they were cooled we cut out a piece of the cake, popped in a spoon full of Tesco's Finest Lemon Curd, and popped the piece of cake back in, before I piped on some of the meringue (ok he couldn't/wasn't going to do it all), and cooking them in the oven for 2 minutes to give a golden glow to our meringue.


Cupcakes Makes 18

1 cup cream ( I used Elmlea Double Light)
1 cup caster sugar
2 eggs, lightly beaten
1 1/2 cups self raising flour

Finely grated rind of 1 lemon

Lemon Curd (I bought some but I guess you could make your own)

Meringue

1 egg white
85g caster Sugar


1. Preheat oven to 180'C. Line a normal size muffin tin with muffin liners.

2. Place all the ingredients in a large mixing bowl and whisk until thick and smooth.
3. Divide mixture between prepared liners and bake for 14-20 minutes (mine was cooked in 14 minutes) or until cakes spring back to touch. Cool the cakes on a cooling rack.

4. For meringue, beat egg white until firm peaks form, gradually add sugar, a tablespoon at a time, beating until sugar has dissolved between each addition. Spoon meringue mixture into a piping bag.

5. When the cakes are cool enough to handle, spoon out some of the cake and fill with lemon curd. Place the pieces of cake back and then pipe on a swirl of meringue.

6. Place the cakes back in the muffin tin and put them back in the oven for 2 minutes or until the meringue is golden. (A Blow torch or a couple of minutes under the grill will work too).


Wednesday, 14 September 2011

This weeks challenge over on Sugar Nellies Facebook page is "A Piece of Cake" - a pin board showing a whole selection of cakes in chocolate, orange and white colours for inspiration! The challenge over on Sketch N Stash is Free Choice Sketch so I have used Sketch 40 for the design of this card

Now seeing as I like dabbling in both papers and cakes - I was thinking of making some chocolate and orange decorated cakes too - but thought I would cut back on those calories and show a picture from a previous baking session (but they were gooooood).

These gorgeous papers are free from Three Paper Peonies - they are new to my stash - I found them today while looking around the web!! They are so yummy and they were perfect for this Sugar Nellie image. The lace is from my stash and the brown ribbon I have recycled - had it in my stash for a few years now - it came from a box of chocolates from my favourite Middle Eastern Chocolate Shop - Patchi!!!

I am also entering this card in the following Challenges:


Oreo Cupcake with Vanilla Cheesecake and Gold Dust


The inside - whole oreo on the bottom, a layer of vanilla cheesecake and dark chocolate sponge.


Sunday, 11 September 2011

A little time to blog before I attack the dreaded pile of ironing!!! I am only doing all the uniforms and work clothes etc for the week, but it is a real mountain when you multiply the amount of clothes for each day and four of us in the house!!!

Anyway I really like this digital stamp from All that Scraps and I am entering her in the All That Scraps Wednesday Challenge, which is "anything goes". She is gorgeous and angelic and brilliant to colour. The background papers are from Nitwits Threads and Thimbles collections. I printed out several to make this quilted background. I have layered Birgitta onto pink and black cardstock and onto a doily (from the baking section in the kitchen shop). The lace is from my local embroidery shop and the pink rose from my stash. I have coloured her with promarkers and added some white gel pen effects. Now the sentiment is a peel off - I know they sometimes have a bad reputation for looking cheap and awful but these white sentiment ones I found in my stash, and they suited this topper perfectly!

I am also entering this card into the following challenge:

Crafting when we can - Do it your own way
Card Makin Mamas - Challenge #28 - Digital


Some girlie cupcakes for my friend's daughters birthday party.

Friday, 9 September 2011

It's been back to work week! It has been an early start each day as our son has just started college and has to catch the bus very early! However the early start has made me more organised - I managed to iron a pile of clothes this week (uniforms, clothes etc for all week) so no battling with an ironing board at 6.30 in the morning!!

I have had time this evening to craft, which is lovely!! This little girl is from Sugar Nellie and the layout comes from the sketch this weeks challenge over on the Sugar Nellie Challenge Blog - The Sugar Bowl Challenge.

The background papers I have used is from the Nitwits on a High Note Collection and the foreground strips of paper is from Nitwits Threads and Thimbles collection....which suits the image perfectly! I have added some string (made my own baker's twine using a promarker) and some white gel pen effects. The leaf stamp came with the Sugar Nellie stamp collection. The leaf has been stamped onto rust bazzill cardstock.

I am also entering this card in the following Challenges:

Everybody Art Challenge - #158 - Autumn
Cute Card Thursday - At the Office
Stamp Something - Anything Goes
Make it Monday - Anything Goes


Chocolate Cupcakes, Covered in Dark Chocolate Ganache and a Dark Chocolate Heart (made with Chocolate Transfers)