Monday, 31 December 2012

New Year is upon us and once again we reflect on how fast the last year has gone.  As parents we have watched our children grow up so much in the past year.... our older sons have develop into young street wise men,  and our youngest son has won the battle with ear complications and has started to make some major progression in guitar and piano playing.  Of course there has been lows mixed with the highs, but we have managed to stay positive and now look forward to reaching newer goals in 2013!

Christmas for us is always a family affair, and I for one, enjoy preparing our Christmas meal and making sure everyone gets there requests filled at least on this day.  Having said that I wouldn't be making a cheesecake this year, as we do one almost every year and we would have a trifle instead (I know just a bit boring) I was persuaded by the middle son, on Christmas Eve to make one.....hence the baking of a Baileys Cheesecake!

Having researched several options, I couldn't quite find one that had enough Baileys (if you're going to use it you might as well be able to taste it).....so I winged it....and boy did it taste good!!


Baileys Cheesecake

12 Generous Servings: - Thousands of Calories

Base

300g ginger nut biscuits (crushed into fine crumbs)
50g butter melted

Cheesecake

4 x 250g tubs cream cheese (1000g total)
250ml Baileys 
250ml Double Cream
4 eggs
5 tablespoons icing sugar
50g plain flour

Mixed the melted butter and the biscuit crumbs together and press into the base of a 9 inch round loose bottom tin.  (Deep one preferable)

Bake at 175 degrees celsius for 10 minutes.

While the biscuit base is baking, whisk together all the cheesecake ingredients until thick and creamy,  about 5 minutes.  

Pour the cheesecake mixture over the biscuit base, and bake for approximately 45 minutes on the middle shelf of the oven until firm on the outside and still wobbly on the inside.  Remove from the oven.  Allow to cool, then chill for several hours, preferably overnight.  

Sunday, 18 November 2012

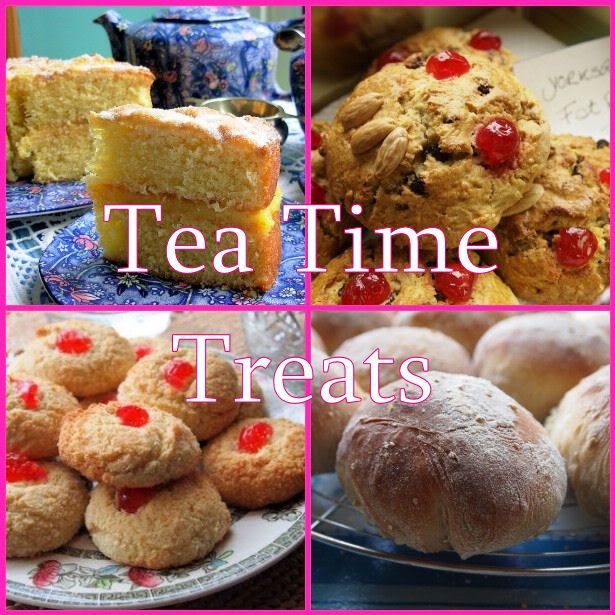
The days are rolling by so quickly.  I have had various work commitments over the past two weeks, so haven't had much time to bake.  I still wanted to give Alphabakes November Challenge, hosted by Caroline Makes and The More Occasional Baker, a go, but the letter of the month being "J", was a tricky one!  Hmm I couldn't really come up with much inspiration for "J", only Jam and Jelly came to mind and I couldn't quite come up with anything really exciting.  Tea Time Treats hosted by Karen at Lavender and Lovage and Kate of What Kate Baked is having a birthday challenge to celebrate one year of their challenges, with "Cake", so thought it would be perfect to enter my cake their too!


So after much deliberation, Jam Crumb Cake it was!!  Having made it twice over the past two weeks, once using raspberry jam, which seems to disappear, and then as below using blackberry jam with whole blackberries....it was brilliant.  The mix of sweetness from the crumble and the tartness of the berries in the jam, along with a vanilla sponge, worked well together and it went down a treat, on a rather cold evening last week!

Jam Crumb Cake


Grease and flour a 8 inch round tin, (mine was about 1 1/2 inches deep).
Preheat the oven to 180 degrees Celcius.

Cake:
5 oz plain flour
4 oz caster sugar
1 3/4 teaspoons baking powder
3 oz butter
125 ml milk
1 large egg
1 teaspoon vanilla extract
5 oz (I added a bit more) jam

Crumb Topping
3 oz butter softened
2 oz brown sugar
2 oz granulated sugar
3/4 teaspoon cinnamon
6 oz plain flour

For the Cake......Whisk all the ingredients together until combined and pale in colour and then pour into the prepared cake tin.  Dollop the jam on the surface of the cake mixture and lightly swirl in. 

For the Crumb Topping....Mix together the sugars, butter and cinnamon.  Stir in the flour and using your fingertips rub the mixture together  until it looks like breadcrumbs.  Sprinkle over the jam cake mixture.

Bake for 25 to 30 mins until golden and a cake tester/wooden pick, inserted in the centre comes out clean.  Allow to cool in the tin.  


Wednesday, 31 October 2012

Tis the season for lots of pumpkin!  Pumpkins here are not like the ones I can get at home (St Helena), or like my grand-parents grew, with their dark green skins and bright orange flesh inside!  I haven't tried cooking any of the orange ones found here, as they look all dry and forced ripened, so they appear to be grainy and bitter!  To get around this.....Libby's 100% canned pumpkin found in Waitrose, is the best answer to proper home-grown stuff, and can easily be found all year round!

Yesterday I made a Pumpkin Cheesecake.  It is one of my absolute favourite baked cheesecakes, even though for some pumpkin is a bit like Marmite.....you either like it or you hate it.....but in our house we love both!

How to cook Good Food and Franglais Kitchen host a One ingredient challenge, which this month happens to be pumpkin or squash so my Pumpkin Cheesecake is perfect for this. (Recipe Below).


My friend Sue gave me this recipe about 20 years ago.  I think she got it from her aunt after visiting her in the USA or Canada. Having twigged it  with varying amounts of cream cheese or the years, I think its now in a good place!

Ingredients - Base:

1 1/4 cups of finely crushed ginger biscuits crumbs
1/4 cup of melted butter

Filling:
3/4 cup granulated sugar
14 oz cooked pumpkin or a 14 oz can of pumpkin
600g of full fat cream cheese (I used supermarket value brand)
2 eggs
1/2 tsp ground nutmeg
1/2 tsp cinnamon
1/2 tsp ground mixed spice

Method:

Preheat the oven to 150 degrees Celsius and base line a 9 inch round, deep spring-form pan.  Half fill a Roasting tin with hot water....to use later. 

Mix the biscuit crumbs and melted butter together and press into the base of the pan.  Bake for ten minutes and then remove from the oven.

Cream together the cream cheese and sugar then mix in the eggs, one at a time.  Add the spices and mix until well combined.  Using a large metal spoon, gentle fold in the pumpkin.....dont worry if there are areas of white, it looks great in the cooked cheesecake.

Pour the cheesecake mixture over the base and place in the middle of the oven.  Place the roasting tin with water at the base of the oven, to create a steamy atmosphere in the oven.  

Bake for 40 -45 minutes until the outside edges of the cheesecake are firm to touch, but the middle of the cheesecake still has a slight wobble.  (Try not to open the oven until around the 40 minute mark, otherwise the steam will escape).

Cool and then chill well....overnight, if you can wait!

Monday, 22 October 2012

I have been wanting to bake up a storm all week, but I seem to be loosing my mojo very fast amongst other things too and yet baking is what makes me happy....but it hasn't been working this week!!

I came across The more occasional Baker and Caroline Makes by chance and they host a monthly Alpha Bakes challenge, with this months, host Ros, hosting the letter N.


With nuts off the menu in our house as my husband has an allergy, and most recipes beginning with a N have some sort of nuts in it........Neapolitan Mousse Cake was an option. I baked my three sponges in the same pan, to make a slim, layer cake.  

I used a 6oz victoria sponge mix ( 6 oz of each self raising flour, caster sugar, butter, 3 large eggs, 2 tablespoons milk, 1 1/2 tsp baking powder and the seeds from one vanilla pod). I divided each one equally and then added pink food colouring to one and three tablespoons of cocoa, mixed with two tablespoons warm water to the other.   I baked it at 180 degrees celcius for around 15 minutes.  

I filled the layers and outside with a soft chocolate mousse filling.  - equal weights of light double cream and dark chocolate, heated together and allowed to cool to a soft butter consistency, before stirring in some more hot melted chocolate, which sets quickly and make a mousse with chocolate bits in it.  (sweet but yummy).  


Monday, 8 October 2012

Autumn is upon us and the days are certainly feeling colder.  Small son was asking this morning "how many more days until Summer!" He was appalled that it wouldn't be for another 8 months - and to be honest I really didn't need to be reminded of that myself!

At least at this time of the year there is an abundance of apples and pumpkin! After  swimming club  on Friday evening, I made an apple pie.  It was lovely warm with a bit of cream, and perfect comfort for the cold, wet weather!

I used granny smith apples, which I sautéed in a small amount of butter, then added some cinnamon and a tablespoon of brown sugar.

The sweet shortcrust, using plain flour, icing sugar and egg yolks. (Recipe to follow).


Wednesday, 3 October 2012

After a long break, I am building up to a blog post.  I have had a lovely summer off with my family....some scattered baking here and there along with the odd card and tag.  I have met up with friends and family who I haven't seen in a long, long time and its been great to get reconnected with them.  

We went off to see Team GB men at the Olympic football....our first ever football match!  The atmosphere was electric and we were literally sat on the edge of our seats the whole time....and yes Team GB won (on that occasion).  We were interviewed by the BBC Wales reporter and we had our picture (as below) on the BBC Wales news and on the BBC Wales on line page....to add to the excitement!


Scattered baking....here and there ( Shabby Chic cupcakes.....love the colours)


Unusual colours for a wedding cake....but it turned out beautifully....white chocolate and carrot cupcakes!


We spent a few days in London, which we really enjoyed.....(that little head, photo bombing our picture again)......took the boys on the London Eye this time and met up with friends......who we hadn't seen for ten years!


Now its back to school and as the Autumn is now here....dark nights, dark mornings and cold days....I expect I shall be spending many hours in my corner in the kitchen....which I am really looking forward too.

Wednesday, 8 August 2012

Zero-Baking-Required

I came across Masion Cupcake by chance....and I am so glad that I did.  I enjoyed reading the write ups and I am always inspired by any Cake Blog!!  I couldnt resist joining in with the Zero Baking Challenge and made these homemade marshmallows last night!  Marshmallows are making a real comeback with new flavours and names....now being named Gourmet Marshmallows etc.

My mum used to make these when I was a child.... so did my aunties (Janet and Joan), so I am using a family recipe.  We always had them in different flavours and colours.  When I was making these yesterday, the first time in years...my eight year old couldn't really believe they were marshmallows...and covered in coconut!! He has been only used to seeing the stiff ones on the shelves in Supermarkets in either pink or white!  They did go down a treat when they were ready.....but they are sweet!!


Vanilla and Toasted Coconut Marshmallows


Recipe: (Makes 16 - 20 pieces)

1 lb granulated sugar
275ml very hot water
2 sachets gelatine.
2 tsp vanilla flavouring/extract
6 oz coconut.

Toast the coconut, either in a hot oven or over a low heat in a saucepan (I do mine this way, stirring all the time so it doesn't burn).

Allow the coconut to cool, then use half of it to cover the base of a 8 x 8 square tin.

Place the sugar in a large bowl.  Measure the water into a cup or bowl and add the gelatine.  Stir until the gelatine is completely dissolved, and then pour the mixture over the sugar.  Add the vanilla flavouring.  Whisk on a high speed for approximately 10 minutes until the mixture is really thick and light in colour.  (Beware of the sticky splashes).

Pour gently over the coconut in the prepared tin.  Tap the tin slightly to release some of the larger air bubbles.  Sprinkle over the remaining coconut to completely cover the marshmallow.  Allow to set in the refrigerator for about an hour, before cutting into squares.

Saturday, 28 July 2012

It's been ages.....but this week.....I have an excuse.....I have had no time to blog......I have been enjoying the sunshine and making the most of each hour of my summer holidays with my family.....because at one point with all the rain, we were beginning to think that our next chance of some sun would be summer 2013!!

I haven't been baking much - I had a major cake disaster a few weeks ago which is still haunting me....and I still need to pick myself up of the floor!!  I hate to fail!!! I have made a few novelty cakes.....but I have sat tonight and look through my whole blog reflecting....there were days when I used to make cards upon cards but how materials have changed and now the craft world is forever evolving!!

I have promised the little one that we would bake tomorrow (its suppose to rain)....so a carrot cake is on the cards!!

Friday, 8 June 2012

The weeks have flown!  Work has been busy, home life has been busy and the weather - that is debatable!! The half term holidays have been so relaxing and we even managed a visit to Choccywoccydoodah in Brighton!!  It was a dream of our 8 year old son, to go there, so during a visit to see our older son, who is at Uni in Brighton, it seemed only fitting to visit, the famous cake place!!

 The cake displays were amazing in the shop, the interior decoration in the Bar Du Chocolat was brilliant, and a slice of Tiffin decorated with melted Belgian chocolate was so huge, our boys had to have half of their slice in a takeaway box.  My hubby and I shared a slice of the Choccywoccy chocolate cake - it was huge, great chocolate taste but slightly dry, not sweet, served with lots of melted Belgian chocolate, berry sauce and a huge dollop of vanilla ice-cream made it so delicious.   (Could have gone for another shot of this on the second day......oh but the calories).  I will keep it on my tick list for a visit again.....it isn't a place, you should do just once!!  The coffees and the hot chocolates are served in the biggest cups, I have seen.....and they take some finishing!!

Baking is my down time.....my time to relax and to escape into a little world of my own.....it saves me from the stresses of life!!  These fresh strawberry and coconut cupcakes, with vanilla swiss meringue, a dollop of cream and summer berries were delicious!  They were perfect for the warm day that I made them and they disappeared quickly too!


Fresh Strawberry and Coconut cupcake with Swiss meringue and summer berries

Makes 12

Topping - 150g frozen summer berries defrosted.

 Cake

6oz self raising flour
6 oz caster sugar
6 oz butter or margarine
3 eggs
100g fresh strawberries – washed and chopped into small pieces
1 tsp vanilla
1oz dessicated coconut
3 tablespoons milk

Mix the eggs, flour, sugar, margarine and vanilla together until the mixture is thick and pale and creamy.  Stir in the fresh strawberries, coconut and milk, then divide between 12 large cupcake cases.
Bake for approximately 15 minutes at 180 degrees Celsius until well risen, golden and springy to the touch

Swiss meringue buttercream

2 egg whites
100g caster sugar
175g softened butter

Whisk the egg whites at high speed in a clean bowl over a pan of simmering water until soft peaks form.  Gradually whisk in the sugar, until the sugar is dissolved.  Carefully remove the bowl from the simmering water and whisk for approximately 10 minutes.  Allow the meringue mixture to cool completely.  When cooled, whisk in the softened butter, whisking until the meringue is of a consistency suitable for piping.

To Assemble.

Pipe the swiss meringue butter cream onto the cakes.  Spoon over a tablespoon of defrosted summer berries and serve immediately.


Jubilee Cupcakes  (For the Local Hairdressing Salon)


Wednesday, 9 May 2012

A few weeks back I was asked if I would like a German Friendship cake by a colleague and friend....to which I accepted.  In the same week, three other people asked me, and I had to turn down the offer, as I knew I was getting some later in the week.   Having then been given a container with gloopy, bubbly mixture inside and a set of instructions on how to look after the mixture.....called Herman.....I came home and Googled it (as you do) to see what this thing would eventually look like!!  As it look decent and I always like a bit of a baking challenge.....I sat Herman on my kitchen worktop in a bowl as instructed and....told my 7 year old that he needed to remind me to look after Herman!!

Now Herman happened to visit our house during the birthday weeks....so as it was a sourdough cake, I decided to delay Herman a little to fit in around our birthday cakes by keeping him for 13 days instead of nine days........by giving him his food on day 5, and then just stirring him for the next 6 days.  When I added Herman's last food, I didn't divide him and gave him away as instructed,  instead, I divided it the next day, baked mine and then gave my colleagues the starter dough with a piece of cake, the next day at work!!!  The result was....it was more convincing to show friends, what their starter would turn into and they were happy to take Herman home!!

I added mixed dried fruit to mine which had orange peel in, instead of just raisins, and it was a beautiful, moist cake....that the two oldest men in the house...ate warm with ice cream (alright for some).  

If you haven't been offered a started.....or would like to start one to hand around the instructions for a starter can be found here http://www.hermanthegermanfriendshipcake.com/


We have finally past the birthday month in our house.  I enjoy baking, I find it calming and relaxing.... so it was great to be baking for three weekends in a row, which also included making cheese straws and coconut fingers and then finishing off with the chocolate cake of all cakes for my son's 17th birthday.  It didn't last very long......having fed a few teens with a huge wedge each on the day  and  a piece for them to take home.  Normally at the is time of the year I am worried about making my chocolatey cakes with huge bands of chocolate around them as heat is chocolate's worst enemy......but heat is something we are definitely missing right now and the winter clothes are still making an appearance!  I think we can safely say....it is the wettest drought on record!!!


Create your own Keep Calm posters and save and print them on home


Wednesday, 25 April 2012

We are on a run of family birthdays at the moment - Sister in Law's (40th) on Friday 13th April, so chocolate cake and cupcakes, my hubby's on Saturday 21st April so Lime and Coconut Cake with White Chocolate and this coming weekend our son's 17th birthday......so another cake...... yet to come!!

I have also made the apple and caramel cake which I posted a few weeks back, two weekends in a row for the birthday's dessert!   I used half of the mixture to make a lower cake which we served with cream the first week and with a home-made whisky sauce the second week (as the kids had already eaten).  I would definitely recommend the apple cake, served warm with the whisky sauce!!

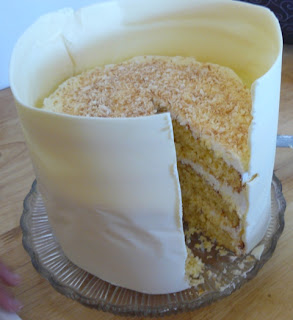
Coconut and Lime cake with White Chocolate


7 inch round cake tin, greased and lined (I have three so can cook my 3 layers at one go)
Oven temperature 180 degrees C

Cake

8 oz self raising flour
8 oz soften butter or margarine
8 oz caster sugar
4 eggs
2 tsp baking powder
1 large lime 
1 oz dessicated coconut

Topping

1 oz  dessicated coconut

Chocolate band

300g white chocolate melted

Frosting - I used lime flavoured cooked flour buttercream (recipe found lower down on my blog)

Whisk together the eggs, butter and caster sugar until pale and creamy.  Stir in the flour and baking powder (so it doesn't splash up in your face) then whisk until the flour is fully incorporated.  Stir in the coconut and the rind and juice of the lime.

Divide the mixture between the pans or if just using one pan, divide the mixture so there is enough to make three layers.  

Bake for approximate 20 minutes until golden and when a cake tester is inserted in the middle of the cake it comes out clean.  Remove from the oven.  Allow the cakes to cool for a few minutes in the tin, before removing them from the tin to cool completely. 

While the cakes are in the oven, toast the remaining coconut by placing in a small saucepan over a heat source, and stirring until just coloured.  Remove from the heat and allow to cool completely.

Layer the cake with the frosting.  Also frost the sides and the top of the cake.  Sprinkle over the cooled toasted coconut.

For the White Chocolate band.  Measure the circumference of  the cake and the height of the sides (I use a strip of baking paper).  Cut a piece of baking paper just over the length and height of the cake measurements.  Spread the melted chocolate over the baking paper, covering all of the paper.  When the chocolate is just set (too hard it will crack, too soft it will pour of the paper when you lift it up), lift up the paper and wrap the chocolate band around the cake.  You may need to used a bit of melted chocolate to hold the edges together.  

Allow the chocolate to fully harden before removing the band of baking paper.  

Monday, 9 April 2012

Yesterday I had a sort out.....on Easter Sunday (I most certainly did)!!!  I reduced all my visible craft stuff  (on a shelf which is on daily view) to about 25 % (still need to sort the stuff in cupboards/drawers etc), and ditched all those weeny pieces of card and paper that I was keeping to do something with, along with lots of patterned paper that I have never used......not ever!!  (I will be taking a lot to Preschool for the kiddies to do collage with......I couldn't just bin it all!!!)   I bagged up a life times worth of pieces of card stock for stamping on and organised all my remaining bits neatly and told myself that if I was going to make any more cards they would be clean and simple!  (Let's see how long that lasts for!)

Anyway my first card on my new clean and simple plan is a Wedding one (off to a wedding in 5 weeks and many inches to loose/dress etc. still to sort)  which fits in with Dream Valley Challenges which is Wedding/Love.   


The image is from The Greeting Farm, sentiment done on the computer, ribbon from my stash, and Promarkers for colour.  

Friday, 6 April 2012

ahh Blogger has a new look - so a bit confused over the whole posting set up (pray it comes out right)!  Anyway in the house of PapersandCakes.....there has been lots of cakes....but no paper!!  I intend to get the paper out over these holidays and do a bit of crafting but I am also thinking of getting rid of a lot of my craft stuff that I just simply don't use.....decisions!  

Anyway we are still on the Pumpkin goodies.  I love pumpkin and so does my family so this week its Pumpkin Cheesecake Muffins with Coconut Streusel.  These were soft, moist and so delicious.  I was trying to persuade my guys to wait for them to cool so the cheesecake would set, but the smell was just circulating through the house and I found myself on repeat saying "wait for them to cool."  In the end....guy number 1 took a cake outside in the garden and held it until it kind of cooled!!!!!!

A little work is required ahead, to freeze the filling for and hour before baking - but worth the effort!


Recipe:

Makes 24  
Oven temperature 180 degrees Celcius
Muffin tin lined with paper cases

Muffins
3 cups plain flour
3 teaspoons cinnamon
1 1/2 teaspoons ground mixed spice
1 teaspoon salt
1 teaspoon baking soda
4 eggs
1 1/4 cups sunflower oil
2 cups granulated sugar
2 cups pumpkin purée (1 lb cooked weight pumpkin mashed)

Filling
4 oz cream cheese
4 oz mascarpone cheese   (or use 8 oz cheese cheese instead of 4oz of each)
3 tablespoons icing sugar

Coconut Streusel
1/2 cup brown sugar
1/2 cup plain flour
4 tablespoons cold butter
1 1/2 teaspoons cinnamon
1/2 cup coconut

Prepare the filling by mixing together the cream cheese and the icing sugar until smooth.  Spread into a long roll onto clingwrap or baking paper, roll up and freeze for about and hour.  It should be hard enough to cut into pieces to fit into the muffin tin.

To make the muffin batter - Mix the flour, spices, salt and baking soda together.  Whisk the eggs, oil, sugar and pumpkin together until light and creamy.  Add the dry ingredients and mix until the flour is just moistened.  The mixture will be quite lumpy.

To make the Streusel - rub the butter into the flour until it resembles breadcrumbs.  Then stir in the coconut and the sugar.  

Half fill each muffin case with the batter.  Remove the cheesecake roll from the freezer and divide into 24 pieces.  Place a piece in each muffin case on top of the batter.  Divide the remaining batter among the 24 muffin cases to cover the cheesecake pieces.  Sprinkle the coconut streusel over each one and bake for 20 - 25 minutes until golden or until a cake tester  comes out clean.  (insert the cake tester just of the middle of the cake as the cheesecake will be in the middle).

Cool completely before serving so the cheesecake can set.  

Wednesday, 21 March 2012

A little baking and a little crafting....the way it should be......with some pumpkin in hand....baking was definitely on the cards!!!

First the Crafting - This week over at The Secret Crafters Saturday Challenge is Doilies are not just for cakes! I have had this stamp from Caron Vinson for ages but never used it....but she is perfect for the person I want to give this card to. All the pieces for this card have come from scraps in my stash, promarkers for the colouring and some glamour dust on the wings, and a fiskars edge punch for the border.


Waitrose sells cans of pumpkin puree (in the tin fruit section). It is a 400g tin jammed packed with pumpkin puree - no water etc, just pumpkin! I usually make a pumpkin cheesecake, but thought I would do something a little different this time......hence a pumpkin roll.

I made two of these.....because I was curious to see how they would turn out using different sugar and also after opening the can of pumpkin.....I didn't want to waste it!! In take 1, I followed the original recipe for the cake from here (minus the salt and using caster sugar) and did my own frosting.......as I don't like over sweet cream cheese frosting.

Pumpkin Roll - Take 1 - Using Caster Sugar
Dense texture......but very tasty.


The cake in take1 was rather dense with the caster sugar so I then had another go using granulated sugar but I twigged the recipe as below:

Pumpkin and Coconut Roll - Take 2 Using Granulated Sugar
Definitely better in taste and texture.


INGREDIENTS:
Cake:

1 cup granulated sugar
3/4 cup plain flour
1 teaspoon salt
1 teaspoon bicarbonate soda
1/2 teaspoon cinnamon
3 eggs
2/3 cup mashed pumpkin
4 heaped tablespoons coconut

Filling:

200g cream cheese, softened

2 level tablespoons icing sugar

Preheat the oven to 350F/180C. Grease a 15 X 10-inch swiss roll pan and line with baking paper which is just a bit longer and wider than the pan.

Mix the sugar, flour, salt, soda, cinnamon, and eggs in a large bowl for about 5 minutes until pale and creamy. Use a large metal spoon to mix in the pumpkin and the coconut. Pour the mixture in the prepared pan and tilt from side to side so the mixture evenly covers the pan including the corners. Bake for 14-15 minutes until springy to the touch.

While the cake is cooking, lay a large piece of baking paper out and sprinkle over some sugar. (This helps to stop the cake from sticking to the paper while it cools). When the cake comes out of the oven, turn the pan upside down on the sugared paper. Gently peel off the baking paper from the cake. Working quickly, cut a shallow groove about one inch in on the short side of the cake closet to you. (this helps to roll the cake up better). Roll the pumpkin cake up with the baking paper, and leave to completely cool.

While the roll is cooling, mix the cream cheese, and powdered sugar together until it is light and creamy. Once the roll is cool, unroll carefully and spread the filling over the cake. Roll the cake up once again. If there is time allow to chill....it does taste better if left to chill!!

Sunday, 18 March 2012

Cake pops - little balls of cake on a stick, enrobed in chocolate and smothered in sprinkles!! I love making these. They are a fantastic way of using up left over cake, or cake trimming.....or in my case I made a sponge in the microwave to make these!! You will need to break the cake into fine crumbs (a fork does the job) and then mix in some buttercream or ganache to make a cake dough.

These ones have coconut and lemon cake inside and are covered in white chocolate and glitter sugar....but the flavours for these are endless.....use any cake and enough buttercream, just to bind the cake together!

To make mine I used:

Cake

2 oz self raising flour
2 oz caster sugar
1 egg
2 oz butter or margarine
1 oz coconut
grated rind of a small lemon
juice from the same lemon

Ganache
3 oz white chocolate melted
five tablespoons double cream

Covering:

200g white chocolate (melted)
sprinkles

lollipop/cake pop sticks (made of paper)

To make the cake:

Mix all the ingredients together in a microwave proof bowl. Cook in the microwave on High for approximately 5 minutes or until well risen and springy to the touch. Leave to cool for a few minutes before removing from the microwave. Remove the cake and empty on to a plate. Using a fork, break the cake to form cake crumbs. Leave to cool.

When the cake is cool, make the ganache by mixing together the melted chocolate and the cream in a large bowl. Empty in the cooled cake and mix together. It should form a ball of cake dough. Wrap the cake in clipwrap and refrigerate for a few hours or overnight until firm.

To Make the cake pops:

Break of small pieces of the chilled cake and roll into balls. Place the balls onto a tray/plate.
Melt the chocolate and then dip the end (about 1 cm) of the sticks into the chocolate. Place a stick in each cake ball....the chocolate will help to secure the stick in the cake.

Chill the cake pops again for about an hour......or you have kids nagging at you....."are they done yet?"......... Stick them in the freezer until they are firm!!!

Dip each cake pop into the melted chocolate. Rotate the cake pop quickly a few times while holding upside down so any excess chocolate will drop off. Cover immediately with the sprinkles as the chocolate will set really quickly. A short glass will make the ideal stand for them to completely dry.


Tuesday, 13 March 2012

Wow Spring is just around the corner and the sunshine on the weekend was a nice treat! I decided to get some of the craft stuff out on the weekend and made a card......while everyone else was playing music!! I didn't have a design in mind, just went with the colours and bits and pieces I had left lying around (some from some recent wedding invitations). The background paper came free in PC Essentials magazine from Crafters Companion, the ribbons, lace, cardstocks, flowers and gems from my stash and the image is a Manga Stamp from Sugar Nellie. The heart is a stamp from Stampin Up (forgotten the name of the set) and I have handwritten the sentiment.

I am going to enter this card at the Dream Valley Challenges Blog as they have a female themed creation for their current challenge - although some of the cards from their design team is just amazing!!


Now on Saturday afternoon, after cardmaking and music session had ended...... we decided to go and get new school shoes for small son as it would be a bit wrong of us to make him wait until the term ended for new ones (poor feet). Having been out for about two hours, I get a call from our neighbour, asking if we were in. Having explained to her that we were out, she calmly told me that she had just noticed that our house keys were hanging out of the lock in the front door!!! Oh dear......I am glad that I was in the car, with the kids first.......so it wasn't to hard to work out who had left the keys in the door!!! Anyway our kind neighbour, walked across and removed the keys from the door, and kept them until we made a rather speedy journey home!

To thank her for her vigilance and because I was so relieved that everything was still left in the house......I baked her a dozen chocolate cupcakes which were iced and delivered to her door, as soon as they had cooled out of the oven!!!

These are the darkest moistest chocolate cakes, topped with a generous dollop of dark chocolate ganache and then a swirl of cooked flour vanilla butter cream!!

Cooked Flour Buttercream

8 oz granulated sugar
2 oz plain flour
250ml milk
175g butter softened

In a saucepan, mix together the sugar and the flour. Stir in the milk and then heat over a gentle heat, stirring all the time, until the sugar dissolves and the mixture thickens to a thick sauce. (around 7 - 10 mins).

Pour the sauce into a large bowl, add any flavouring and colouring and allow to cool completely. When the sauce is cool, whisk in the butter, until the butter cream is thick and creamy.


Sunday, 26 February 2012

Those who actually read my posts will know I always go on about the weather!! I can't help it...I am an island girl after all!! The weather has been excellent over the past few days......I love seeing my washing drying on the clothes line with the smell of washing powder and comfort filling the air. I love the longer evenings, and that we can maybe be just about brave enough to go out in a t-shirt! (that doesn't include me - I'm still wearing a scarf indoors).

But dark, cold evenings does mean more time to look at Pinterest to find more ideas and things to bake, so Hmm how about these below........probably about two thousand calories per slice - I wouldn't even try to work it out!!

Chocolate Cookie, Oreo, Brownies - a layer of chocolate chip cookie dough, covered in oreo's, smothered in brownie mix and baked to perfection!!


Oven temperature 180 degrees Celcius, greased and lined 9 x 13 inch pan

Cookie Dough

1 cup butter
1 cup granulated sugar
1 cup dark brown sugar
2 eggs
1 tablespoon vanilla extract
2 1/2 cups plain flour
1 teaspoon bicarbonate of soda
1 cup chocolate chips

2 pkts oreos

Brownie Mix

350g dark chocolate, broken into small pieces
250g butter
3 eggs
250g dark brown sugar
100g plain flour
1 teaspoon baking powder.


Method

To make the cookie dough - Cream the butter and sugar until pale and creamy. Mix in the eggs and vanilla extract. Add the flour and bicarbonate of soda and mix together until all the flour disappears. Mix in the chocolate chips. Press the cookie dough into the prepared pan.

Lay the oreos over the cookie dough and then set aside.

To make the brownie Mix - Melt the chocolate and butter together in a heat proof bowl ( I use the microwave). In another bowl, whisk the eggs and sugar together until pale and fluffy. fold the chocolate into the egg mixture with a large metal spoon. Fold in the flour and baking powder.

Pour the mixture over the oreos and cookie dough and spread out. Bake for approximate 40 minutes until the surface is set and slightly cracked on the top. Remove from the oven and allow to cool in the tin.

For extra calories - add ice cream or cream and serve while the brownie bars are still warm.......then eat nothing but carrot sticks for the rest of the week!!!

Tuesday, 21 February 2012

I have been rather lazy recently......wanting to update my posts but just not getting sorted and getting down to it!! I am blaming it on the recent cold snap - I'm a Leo - so I need sun, sun, sun....so the recent cold spell has left me feeling pretty despondent!! Still there have been moments of joy.....seeing Snow Patrol on a rather snowy night in Birmingham in early February was brilliant! I am also lucky to have a lovely family who appreciates all my baking efforts and this caramel apple cake was definitely one that was a lovely treat on a cold evening and boy did it taste good!! A moist sponge with lots of apple pieces, enrobed in caramel = heaven!!


3 cups plain flour
2 cup granulated sugar
1 teaspoon baking soda
1 teaspoon cinnamon
4 eggs
1 cup sunflower oil
2 teaspoons vanilla
3 cups apples finely chopped
1 cup chopped nuts (optional)

Caramel
1 cup dark brown sugar
6 tablespoons butter
1 teaspoon vanilla
2 tablespoons cream

Heat the oven to 180 C/ 350 F/ Gas Mark 4. Lightly Grease a 9 x 13 inch pan

Mix the flour, sugar, baking soda and cinnamon together in a bowl.
In another large bowl, beat together the eggs, oil and vanilla until light and foamy.
Add the flour mixture to the egg mixture with a spoon and stir until the flour is combined. (It will be a little stiff and gluey, but will loosen when the apples are added.)
Stir in the apples and nuts if using.
Scrap the batter into the pan and bake for about 45 minutes until golden, risen and cooked.
Remove the cake from the oven, leave it in the pan and place on a wire rack.

For the Caramel

Place all the ingredients in a saucepan and cook, stirring all the time over a medium heat until the mixture gently boils. Cook for 2 -3 mins after the mixture begins to boil. Remove the saucepan from the heat, then pour the caramel over the hot cake. Leave the cake to cool before serving.